Thursday, April 26, 2012

The Urban Garden...Take Organic to the Next Level.

Follow my blog with Bloglovin
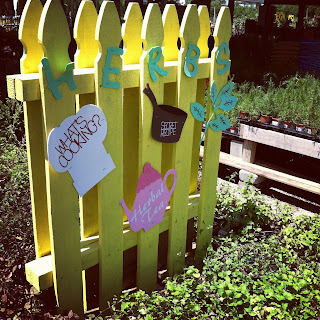

I love to eat fresh food especially organic fruits and veggies, but I hate the organic prices. So I decided to create a quick Urban Garden with a few of the main items to create a fresh garden salad, and spicy salsa.
The reason its called an urban garden is because its not on acres of land...its not even in a backyard...My urban garden is on my front porch:0). For those of us who live in condo's, apartments and urban settings space is of the essence and this is an great enhancement to limited space.
This project is not only easy to create, but its also easy on the wallet with lasting benefits. Total Cost including planter box, topsyturvy, plants, and fertilized soil was under $40.00!

  First have in mind what you would like for your garden to contain. Herbs, veggies, fruits, etc...you can either plant seeds or buy small plants its completely up to you. I prefer small plants with buds developing already, I like to see how the plant looks developed. This helps me properly space the plants reducing overcrowding in the planter as the plants develop and flower.  In the long wooden planter box I decided to plant:

  •  gourmet lettuce
  • cucumbers
  • roma tomatoes
  • cilantro
  • banana peppers
  • hot peppers


I also planted Stevia which is a natural sweetener plant in a separate clay pot and hanging in the Topsy Turvy are strawberries. 


I have never used the Topsy Turvey before so I do not know for sure how effective it will be with the strawberries yet. But I will update this blog later in the season and post updated pics of how the garden is flourishing.
 Keep in mind you do not want your garden to look unkept, it can become an eyesore and decrease property value. Here are a few gardening tips to help keep your garden not only fruitful, but also neat.

  • #1 Used eye appealing planters for your garden. There are so many options as to how you can design your garden, you definitely don't have to use the planter block that I chose. Large flower pots work great as well, just be sure to arrange the plants so they grow in harmony.
  • #2 Whatever planters you chose make sure there is a hole in the bottom of the pot for adequate water drainage. Over watering..or water not having a way to drain could lead to root rot of your plants
  • #3 Use good soil and/or fertilizer..the quality of your dirt does matter. I personally use Miracle Grow soil and products to feed the garden. I am a busy busy on the go professional...and prefer to keep the garden as low maintenance as possible, meaning once I plant I only want to water it.lol. By using Miracle Grow all the other nutrients are in the soil...and I can just add a few drops to the water and they are healthy with minimal additional work.
  • #4 Water your garden! Seems like a no brainer...but people actually do plant flowers and then don't water them until they are already falling over.lol. When you initially plant your garden water it throughly. Then water everyday for the first week if its very hot where you live. I live in Texas. If you reside in a cooler climate water every other day for the first week. This helps the plants root system to develop and grow in the dirt. Keeping it moist and soft with frequent waterings. Are the first week water once a week or as needed, again depending on your climate. Also water during the cooler times of morning or evening, not during the hottest times of the day.
  • #5 Prune and harvest your garden:0)...This is the best part, but remember to actually pick your fruit so that more can grow. Also keep "bushy" plants pruned and trimmed.  
  • #6 Keep the identification tag the plant came with, and use it to mark each plant in your garden. This way you always know how to properly care for each plant.
  • #7 If you have plants that bear heavy fruit, such as tomatoes or peppers. Its easier on the plant to secure a stick or piece of bamboo to the plant with twist ties. This helps the plant from falling over and breaking due to the weight.
This is a Roma Tomatoe plant. I secure it to a bamboo stalk using twist ties. There are 8 small green tomatoe buds on it now:0)
Im hoping my green thumb doesn't fail me and I have great update pics to provide in a few months.

Thanks for stopping by and don't forget to subscribe!

Wednesday, April 18, 2012

Natural Haircare Product Must Haves & Have Nots

Follow my blog with Bloglovin

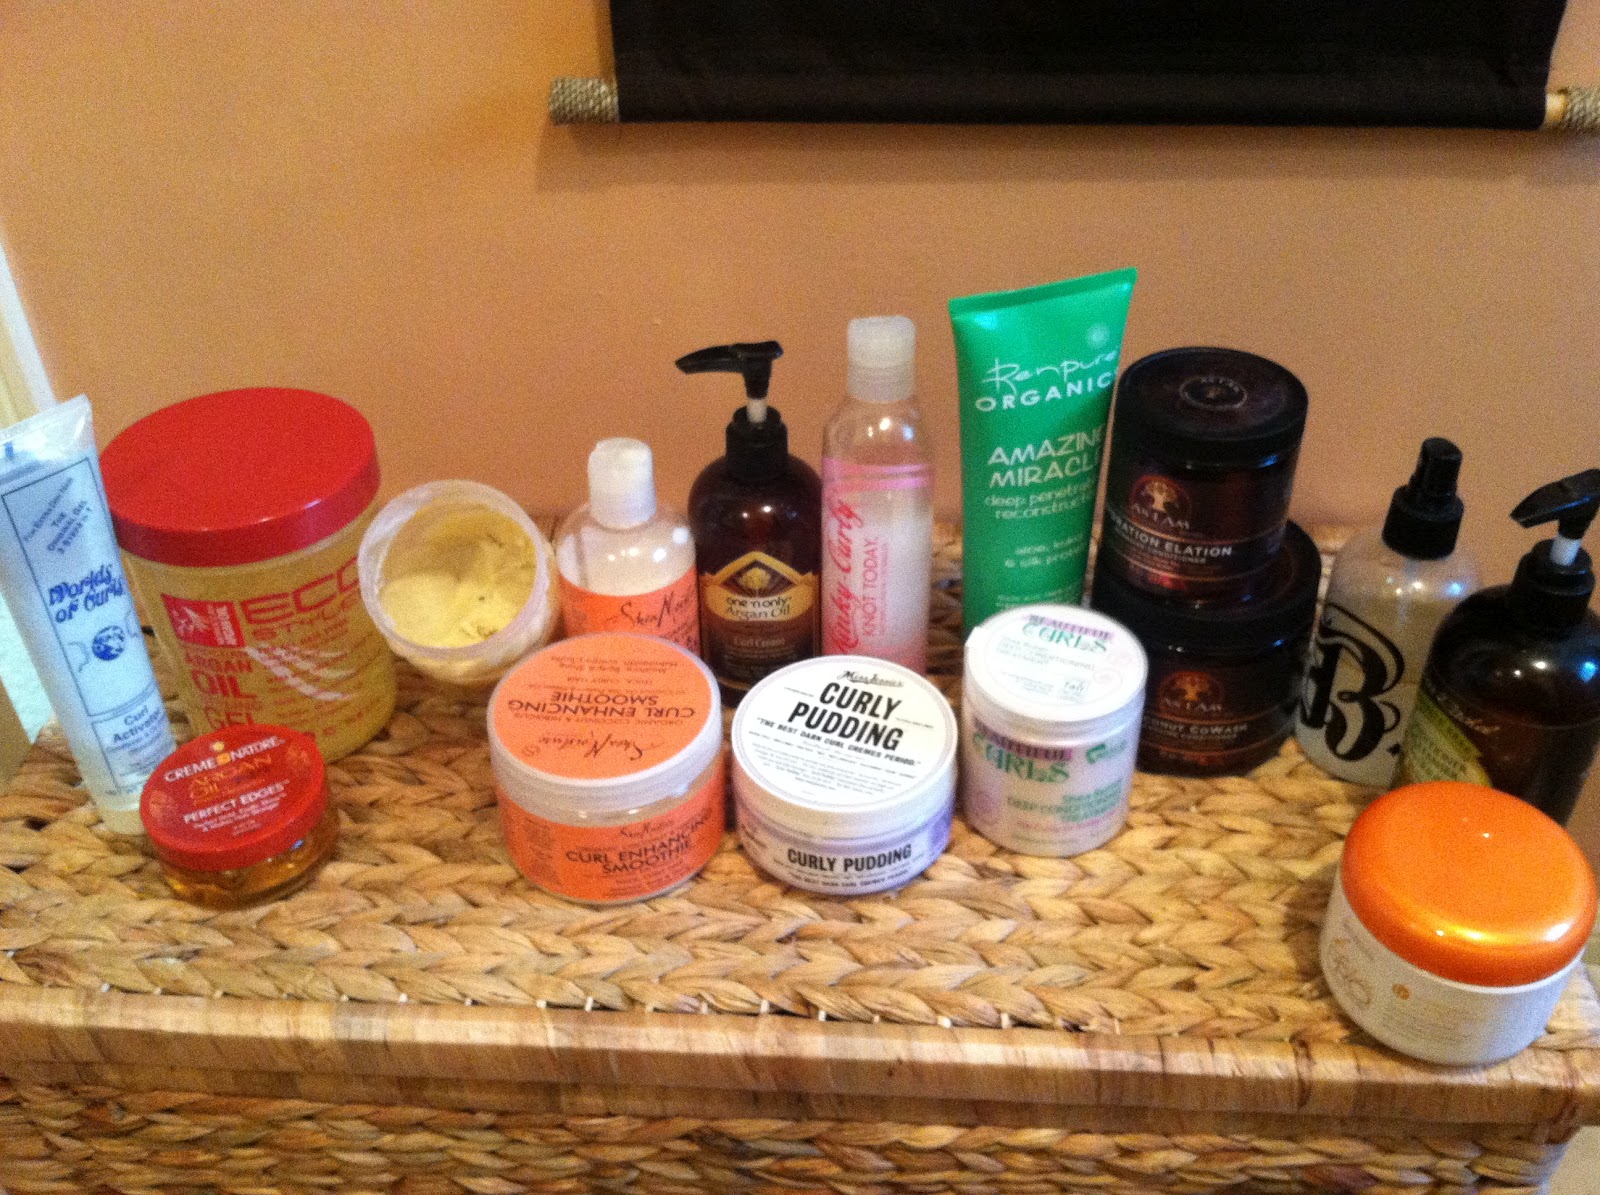
I have been tying to keep my product buying habit under control.... this is my current stash of hair goodies.
(L~R) Styling Aids...Leave-In's...Conditioners/Co-washes
Pictured above are products that are staples. As well as a few products I am just trying out. No one is paying me to promote/rate any of the products, and I paid for them. I Just Luv to find the perfect products for my hair.:=)
Product Reviews and Usage:
Conditioners and Co-washes


Naturelle Kera Pro Restorative *Sally's generic of Kerastase* - Deep protein conditioner I use due to color treated tresses. Provides the deep protein needed to rebuild the strength and elasticity of my hair without the    rough, tough and dry after feel. 

HairOne *Sally's generic Wen*- Weekly co-wash conditioner, gently cleansing alternative to shampoo. Effectively removes any oil build up from my scalp, as well as products from my hair. Rinses clean, but not "squeaky clean" so my hair does not feel stripped. Sometimes I use as a leave in:0)...staple btw

The B Bottle (*__0) is actually my own ACV rinse.lol. I just recycled that bottle because I think its cool.giggles.annyway. 
...I spritz my hair with ACV prior to conditioning my hair. Helps with porosity and frizz issues....

As I Am Coconut Co-wash- Weekly alternative to the HairOne. I like them both equally, This feels more like a clarifying type clean. My curls really "pop" while I us this, and its not quit as thick in texture as the HairOne. 

As I Am Hydration Elation- Moisture deep conditioner. This product does hydrate and provide moisture, however imo its too thin for a deep conditioner. I prefer really thick and rich conditioners...this one is kinda wimpy. 

Beautiful Curls Shea Butter Deep Conditioning Treatment, for curly to kinky hair.- Very Very Thick Conditioner!...Its the closest "whip shea" in a store bought jar I've discovered. Smells sweet and floral, not doughy which is awesome. Delivers on the hydration and my hair soaks in the moisture. Also luv its also FairTrade certified and natural ingredients rule. http://www.beautifulcurls.com/store/pc/catActivate.asp?idcategory=2

Renpure Organics Amazing Miracle Reconstructor Conditioner- I have a serious love relationship with this protein treatment. Its So incredibly Awesome! Provides the perfect dose of protein that keep my coils springing. Its hard to find a protein product that also provides real moisture, Amazing Miracle nails both. I also pre-poo with this occasionally to loosen and detangle my coils before washing. ;=) Staple btw!

Leave-In's and Detanglers


Kinky Curly Knot Today-Detangler..staple...one of my Bff's.lol. I don't know what I would have done without this product. Quick shout out to KimmayTube leave in, which is why I even purchased this.lol. 
Lets talk about slip...you know the most wanted thing in natural healthy hair care. The ability to slip the comb thru you hair, without a snag. This product is my slip master...paired with the Denman classic styler brush they are unstoppable. 

Miss Jessie's Curly Pudding- leave in curl enhancer...~AKA~ gooky, gunky, clumpy, expensive, purple isshh:0/. Sigh. I'm just waiting for the jar to empty to I can recycle it into a rubber band holder. I have tried so hard to like this product but I just don't. Now Im using it randomly to shingle my puff...patiently awaiting its removal from my cabinet.

One n' Only Curl Moisture- leave-in... was a staple, but now its the bases for my kimmaytube leave in along with knot today. It does provide moisture...but NOT all day moisture. Meaning my hair will be styled and detangled in the morning, but by 5 its a dry tangled mess. No longer delivers on my natural hair needs...wont repurchase.

Shea Moisture Curl Milk-leave-in..staple..daily moisture leave in. I normally apply to ends then I seal with argan oil. My hair stays moisturized and detangle throughout the day.

Shea Moisture Curl Enhancing Smoothie-style curl enhancer. StApLE=0). My hair adores this product...and so does my wallet. I use this to finger coil and twist my hair and it doesn't feel heavy and weighted down. Provides a nice soft curl enhancement and hold to my coil outs.

Pure Shea Butter...What kind of natural type 4 diva would I be without pure shea butter.lol. Of course this has multiple purposes with my hair and skin care. Check out http://beautyofajetsetter.blogspot.com/p/natural-nourishment-taboils-i-cherish.html

Style Aids

Eco Styler Gel Argan formula- Tried and true curl enhancer. Especially on very humid days, this product hold up against frizz. The downside is of course the hair is harder...not dry, just temporarily hard.

World of Curls Jeri Curl Activator- An alternate to the Eco gel. Has the same results with my hair. Won't rebuy, but didn't dislike the product.

Cream of Nature Argan Edge Pomade- Works great with making my edges appear neater when slicked into a puff.


Friday, April 13, 2012

April: Style Updates...BantuKnots and Shingling Curly Girl Staples

Follow my blog with Bloglovin
April is a great month....And I'm hoping to have a few great hair days. Its been nine months since I decided to fully cut my hair to its natural texture. At this point I'm pleased my hair is long enough (neck length) to try out my old favorite way to coil my hair...Bantu Knots. Initially I was hesitant to try the bantu knots on natural hair shorter than shoulder length, because of the shrinkage/frizz factors. However I'm glad I did try it on neck length hair because the knot out provided a defined coil. It didn't get frizzy when the hair was separated and fluffed, which tends to happen when I try twist outs.

I clarified using the Aztec Bentonite Clay mixed with ACV and Olive Oil. Once that was fully rinsed I deep conditioned using the As I Am Elation Hydration moisture mask. After allowing that to steam on the hair for 30 min's I rinsed with cool water while fully detangling the hair. Working in 2 sections I applied the KimmayTube leave in conditioner and pure argan oil to seal the ends. To set the Bantu Knots I used Shea Moisture Hair Smoothie and thin hair pins to secure the coils. I allowed the bantu knots to remain in for 2 days, applied Gro Aut Oil to my scalp and styled with scarves. On the 3rd day I did a bantu knot out style, and re co-washed on the 4th day.

On days that I simply do not have a lot of time to bantu or coil hair I have found a new luv for shingling.


A big factor in my new found luv for shingling has to do with my tools. I do not like using a fine tooth combs on my hair...it just seems to tear at it. But my trusty Denman brush does an excellent job shingling my hair without damaging or pulling it. In the above pics the hair is still wet...
  I did a quick co-wash in the shower using As I Am Coconut Co-Wash and >Because my hair is type 4 and very thick<...while in the shower I pull my hair into 2 sections. Upper and lower, each section is held with a clip. This allows me to smooth my edges and wrap the elastic around my poof easier.
Applied KimmayTube leave-in made with Knot Today detangler and scrunched it thru the hair. I used argan serum on my ends to help eliminate frizzing while the hair dries throughout the day. I then used Miss Jessie's Curly Pudding to shingle the hair in the poof. Working in sections I gently brushed the hair from tip to root.
*note* The edges could have been smoothened with a boar bristle brush to get a "neater" appearance.
It has been 9 months since I have straightened my hair...I have 3 more months until my 1yr anniversary milestone.
 Patiently waiting, hoping for the healthiest hair I can grow.


Monday, April 9, 2012

Credit Repair 101:1 Year to Better Credit. Straighten Up & Fly Right


Even jet-setters can run into turbulent financial situations. I wanted to share a few tidbits of information of how to smooth out some of the rough spots. Lets get on the road to better credit and a sky high credit score.

Its helpful to be organized and stay diligent with removing things from all 3 of the credit bureaus. I kept a plain folder for each of the bureaus correspondence and report updates. Remember this will take time, nothing will happen over night...so be patient and keep track of all of the paperwork.
...These steps helped me increase my score by 50+ points and still climbing. Tailor them to your credit situation and repair needs.
#1 Pull All 3 reports and scores
You are entitled to a free credit report every year. Or if you will be continually monitoring your progress its also a good idea to sign up for monthly monitoring thru one of the credit bureaus.
https://www.annualcreditreport.com/cra/index.jsp
http://www.equifax.com/home/en_us
http://www.transunion.com/
http://www.experian.com/
#2 Look at ALL old debt if its over 7years old have it deleted, due to its over the limit of statue for collection and should no longer be reported. Simply dispute it as over 7 years with the credit agency.
#3 Look at debt that under 7 years, but still old. Mail those accounts a Debt Verification letter. 
http://www.creditinfocenter.com/forms/sampleletter9.txt
Basically the collection agency or company listing the debt has to verify they have the right to collect on the debt and prove you owe them the money. They have 30 days to submit it to you in writing. You mail the Debt Verification Letter to the collection agency via certified mail so you have record of when it was sent etc. If they don't respond you can then dispute the info to the credit agencies and send them copies of the letter and certified mail receipt to prove 30 days has passed. Those accounts should be deleted.
#4 OK the collection agency verified it....Instead of paying them and it still sits on your credit. Send them and offer to pay to delete.
http://credit.about.com/od/debtcollection/a/payfordelete.htm
#5 Re-establish your credit...open a secured or unfortunately a high interest credit card, or store card.
You NEED 3-4 lines of credit open to establish and PULL UP your score. Creditors prefer to see a balance not all revolving credit...meaning 2 lines of credit * major card, gas card or store card* and 2 installment accounts * car, personal loan, etc*. 
It also a good idea to have a secured personal loan with one of the banks. A "secured personal loan" is considered a installment account. I used $1,500 to open a CD as collateral and they approved the loan. I also have a line of credit with each bank. 
You could also get a secured credit card with most banks, or with high interest credit cards designed to help people with less than desirable credit rebuild. Orchard Bank is a good example.
https://www.orchardbank.com/
 #6 Do not allow your account balances to exceed 30% of the limit. For example if you have a credit card limit of $1,000.00 only use up to $300.00 of the limit. Try not to carry a balance each month if possible. And of course ALWAYS pay at least the minimum amount due each month. But paying more is helpful to keep reporting balances low. 
Remember your credit did not go bad in one month..so it will not be repaired within 30 days. Be patient with the process and allow at least 3-6months to see improvement. Your score increases the longer good established accounts are reporting...Keep time on your side, with good financial habits.

Monday, January 9, 2012

January Style Update: Lighten Up....Healthy Transformation Black Hair to Dark Blonde/Light Brown

While I adore black tresseses I felt the need to be a bit daring and lift my hair color to a light brown/honey blonde hue. The simplist and of course more expensive way to lighten black hair is to seek a color haircare professional. However if you are like me and on a budget paying $80+ was simply not going to happen...I have more time and patience than money. Taking on this task took alot of research to handle this at home, and a bit of trial and error. This process was actually done over the course of an entire day...So YES I can't stress enough...patience, patience, patience.
Disclaimer: I am NOT a hair care professional. I am simply sharing how I colored my hair and it remained healthy during the process...No breakage, Scalp damage, or Shedding.
I had to re-educate myself a bit about the color wheel to understand how to balance the color I was applying to my hair. What I mean is going from black hair to any form of light brown or blonde could easily lead to a brassy red/orange disaster. So to avoid this common mistake here are a few tips and the process of how I colored my hair.
Tip #1: Choose a hair color that states "Ash" in the color discription...meaning Light Ash Brown etc...
Its up to you to determine what brand you would like to use, and if you would like to use permanent, semi permanent etc. I personally chose a permanent hair color by Ion at Sally's. Also when you chose your hair color also pick up a packet of Ardell Red/Gold Corrector Plus. This will be added to your hair dye mixture to help reduce and eliminate any goldish brassy red hues that can occur.

Tip#2 Back to that color wheel reference...Blues and Violets balances black hair as its lifted to lighter hues. WARNING: In essence to go from Black to Blonde colors you will be bleaching your hair. I chose to lift my hair color by using Salon Care Prism Lites Lightner in Violet, using a 40 developer. I used Clairol Soy4Plex Pure White Creme Developer 40 Maximum Lift.
 I mixed the powder with developer as directed on the package in a plastic mixing bowl and applied it to my hair with gloved hands and a application brush, working in 4 sections.

Tip#3 Apply the lightener to your roots last. Your roots will process faster than the rest of your hair, so its best to apply to the roots after the rest of your strands have been covered.
....Cover the hair with a plastic processing cap and pay attention to how your hair color is changing. Never exceed the time directed on the package. I checked my hair every 10 min's until the color was lifted to a taupish brown.....It took about 30 mins to achieve this lift.

Once it was time to rinse I Shampoo'd the hair gently and throughly. Then applied a Reconstructer Protein Conditioner. I prefer to use Renpure Amazing Miracle Deep Penetrating Reconstructor because although it is a protein conditioner its also moisturizing and my hair never feels like straw. The reason I applied a protein conditioner to my hair was to re-add the strength, and rebuild the strands. Bleaching basically strips the hair so this step helps conteract that potential damage. I allowed the reconstructer to sit for 20 mins, then rinsed and applied a moisture rich conditioner. I prefer to use Renpure Organics My Pretty Hair is Parched moisturizing conditioner, its light weight and very effective.
Now keep in mind its best NOT to wash hair 24hours prior to coloring hair..however I broke this rule. I sat in front of a fan to airdry my hair, once it was completely dry I then prepped to color my hair.

Tip#4 Use vaseline to base the scalp, ear, and neck areas  just as you would when applying a relaxer. This not only provides a protective barrier for the scalp but also henders the skin from staining from the dye.

Mixing: I used a weaker developer when mixing the actual color than I used with the bleach/color lifter. My hair was already lifted to a taupe brown color so their was no need for me to continue to use the harsher 40 developer. I mixed the Ion Ash Light Brown color with Loreal  Oreor Creme 20 Developer in a needle nose bottle. To this mixture I also added the small packet of Ardell red/gold corrector plus. Shaking the bottle with gloved hands until all the ingredients were throughly mixed together.

Application: Working in sections again I applied to the root area last because they process the color faster than the ends. Fully saturate the hair, and I finger comb it through, you could use a wide tooth comb if you prefer. Once the hair is fully saturated cover with a plastic cap and start the timing process...again not exceeding the directed time on the packaging. I check the process every 10 min's to make sure the process is going how I would like. For faster developement you could also sit under a hooded dryer on low setting, but still check your progress.

 Keeping it conditioned & healthy: My color was fully developed in 20 mins and it was time for me to rinse. Now again I'm not a pro but these steps helped me. I did NOT shampoo my hair I co-washed it instead. Rinsed the hair throughly until the water was running clear. I then applied Aphogee Keratin 2 Minute Reconstructor, covered the hair with a plastic cap and allowed to sit for 5 mins. I then rinsed and applied a moisture rich deep conditioner, I chose Shea Moisture Moisture Deep Conditioning Mask and mixed in 1tbs of Olive Oil. I then steamed the mask for 30 min's using the DIY steam method.
Once I did the final rinse of the conditioners I added moisture leave ins and completed a no heat style of finger coils and a coil out fro look.
Here are the results....


I'm very pleased I was able to not only save alot of $$$ by coloring my hair at home. But my hair remained healthy and in good condition. To keep it healthy I will not lighten it again for at least 12 weeks. And I deep condition once a week.
I hope these tips help you with your hair lightening journey..and if you do not get the desired results DON'T PANIC and risk damaging your hair. You can either go to a salon and allow them to do a color correct, which will be $$$$$$$$$$$. Or you can wear a wig for a day or 2, then get a color correct kit from Sally's. If your hair is orangish/red grab the Unred Color Dabber from Ardell and redo your process. Again this process cannot be rushed, so take your time and you will be fine. If you are impatient please leave this to the Pro's.
Take Care and subscribe please:0)